How to Soundproof a Trunk Organizer to Stop Rattles — Easy DIY Fixes
Introduction
Vehicle owners frequently experience unwanted rattling noises emanating from trunk storage solutions. Those vibrations not only reduce comfort but can also cause premature wear of the organizer and surrounding components. This guide explains how to diagnose, mitigate, and permanently silence those noises using readily available products and straightforward techniques. By the end of the article, one will possess a quiet, stable trunk organizer that enhances both aesthetics and functionality.
The methods described are applicable to most cargo bins, including the AOPHY SUV Trunk Organizer and the AOKJOY Collapsible Trunk Organizer. While the guide recommends specific tools, it also offers alternative solutions for readers who prefer to repurpose household items.
Soundproofing a trunk organizer is essentially a three‑phase process: (1) locate the vibration sources, (2) introduce damping materials, and (3) secure the organizer to prevent movement. Each phase is addressed in detail below.
What You’ll Need
- Anti‑vibration foam pads – XCEL Anti‑Vibration Pads (4‑pack, $10.99, 4.3/5 rating)
- Non‑slip rubber strips (included with the AOPHY organizer) or aftermarket silicone grip pads
- Acoustic foam or weather‑strip material (optional for added sound absorption)
- Adjustable straps or bungee cords (the AOKJOY organizer includes built‑in straps)
- Scissors, utility knife, and a marker
- Measuring tape
Step 1: Inspect and Identify Rattle Sources
Begin by emptying the trunk organizer completely. Gently shake the empty bin while listening for hollow or metallic clunks. Pay particular attention to the corners, the base, and any detachable dividers. Record the locations where the noise is most pronounced; these will become the primary targets for damping.
If the organizer is already installed, place a rolled towel on the floor of the trunk and drive the vehicle at a moderate speed (approximately 30 mph). The towel will amplify vibrations, allowing one to pinpoint the exact points of contact that generate rattles.
Documenting the problem areas ensures that the subsequent steps address the correct zones, thereby reducing unnecessary material usage and effort.
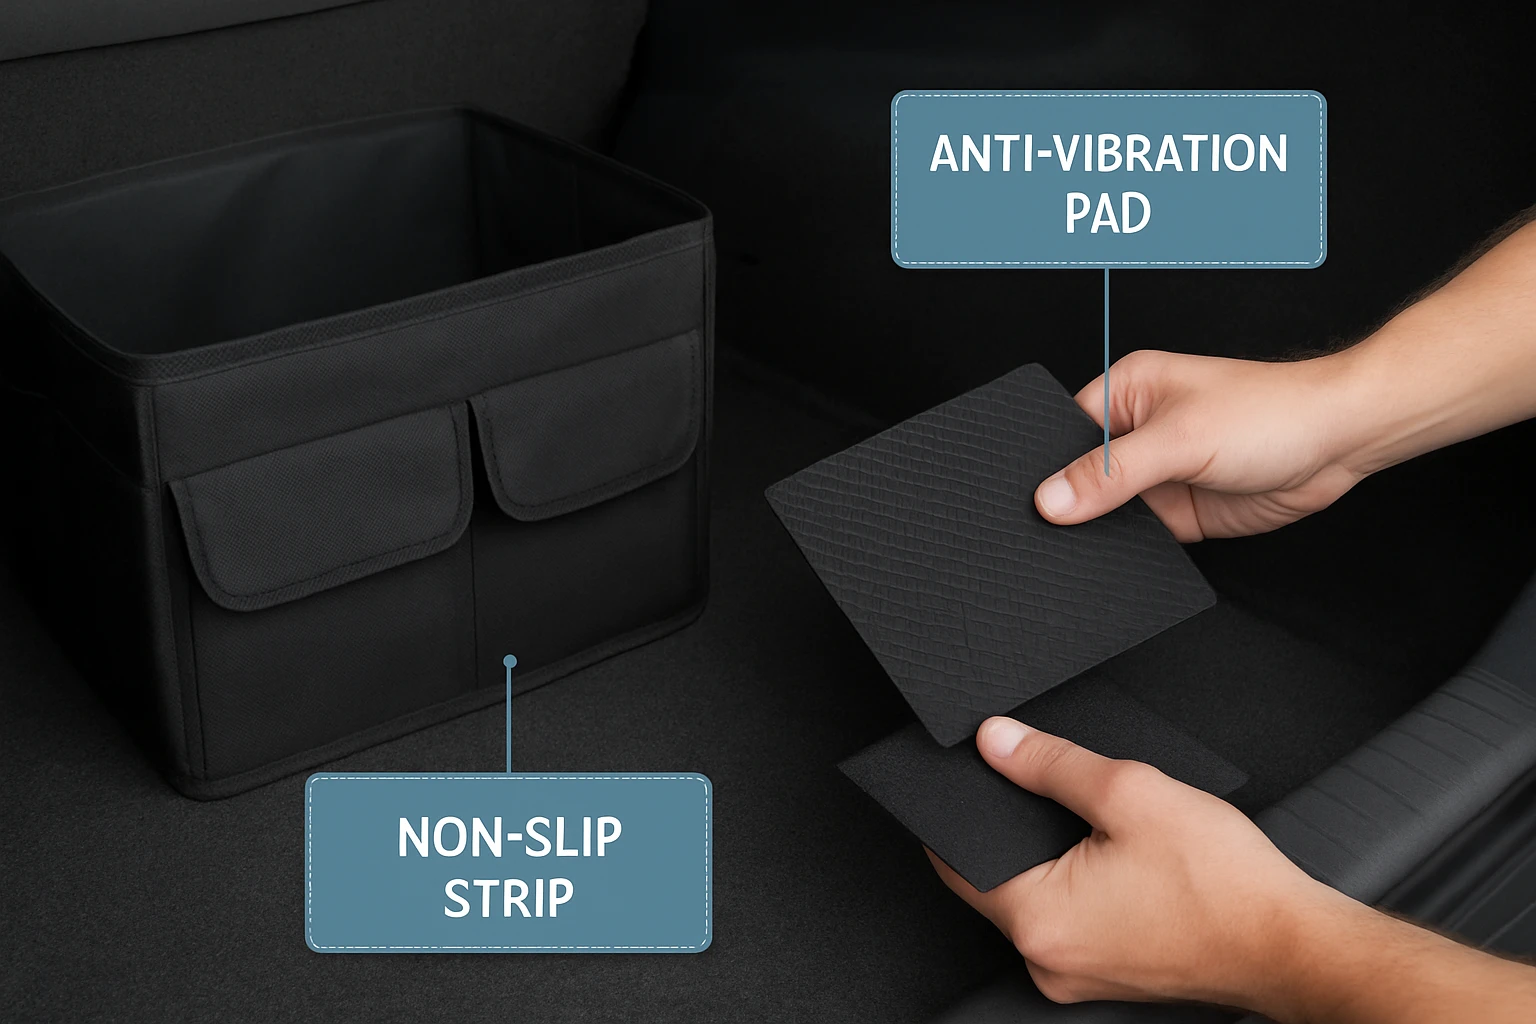
Step 2: Apply Anti‑Vibration Pads
Anti‑vibration pads are engineered from closed‑cell foam rubber that absorbs kinetic energy and converts it into minimal heat. The XCEL Anti‑Vibration Pads measure 4 × 4 inches and provide a thickness of 3/4 in, which is sufficient to dampen most low‑frequency rattles produced by cargo movement.
Cut each pad to fit the four corners of the organizer’s base. Apply a thin layer of adhesive backing to the underside of the pad, then press firmly onto the organizer. The adhesive ensures the pad remains in place during acceleration and braking.
Why choose XCEL pads? They carry a 4.3‑star rating from 988 reviewers, indicating reliable performance across a variety of household and automotive applications. At $10.99 for a four‑pack, they offer a cost‑effective solution compared with custom‑cut rubber mats.
Step 3: Secure the Organizer with Non‑Slip Strips
The AOPHY organizer already incorporates three non‑slip magic strips on its base. These strips create friction between the organizer and the trunk floor, reducing lateral movement. If using the AOKJOY model, attach the supplied silicone grip pads to the bottom of the bin or replace them with aftermarket strips for enhanced grip.
To install additional strips, clean the trunk floor with an alcohol wipe, then affix the strips according to the manufacturer’s instructions. Allow the adhesive to cure for at least 24 hours before loading the organizer.
Non‑slip strips complement the anti‑vibration pads by preventing the organizer from sliding, which otherwise would re‑introduce vibration through repeated impact.
Step 4: Add Acoustic Foam Lining (Optional)
For drivers who demand an exceptionally quiet cabin, line the interior walls of the organizer with thin acoustic foam. This material absorbs sound waves generated by items shifting within the compartments. Cut the foam to match the dimensions of each compartment, then secure it with spray adhesive.
Acoustic foam does not replace anti‑vibration pads; rather, it works in tandem by reducing the audible frequency of any residual movement. The result is a quieter trunk that also protects delicate cargo from scratches.
Step 5: Reinforce with Adjustable Straps
The AOKJOY Collapsible Trunk Organizer includes two adjustable non‑slip shoulder straps that can be fastened to the trunk’s anchor points. Even the AOPHY model can benefit from additional straps if the vehicle’s cargo area provides suitable tie‑down hooks.
Thread each strap through the organizer’s reinforced handles, then secure them to the trunk’s built‑in hooks or to the vehicle’s seat‑belt anchors. Tighten the straps until the organizer is snug but not distorted. This step eliminates any residual movement that could bypass the anti‑vibration pads.
Using straps is preferable to relying solely on friction because it creates a mechanical lock, guaranteeing stability during abrupt stops or sharp turns.
Step 6: Test and Fine‑Tune
Re‑load the organizer with typical items such as groceries, tools, or sports equipment. Drive the vehicle on a smooth road, then on a surface with minor bumps. Listen for any remaining rattles. If a noise persists, examine the corresponding corner and add an extra slice of anti‑vibration pad or increase strap tension.
Repeat the test until the trunk remains silent under normal driving conditions. Document the final configuration for future reference, especially if the organizer is removed for cleaning.
Tips & Pro Tips
- Use a thin layer of silicone spray on the non‑slip strips to maintain flexibility over time.
- When cutting foam pads, cut slightly larger than the contact area to ensure full coverage.
- Consider adding a removable fabric liner to protect the foam from oil or moisture.
- Periodically check strap tension, as vibrations can gradually loosen knots.
Troubleshooting
| Problem | Possible Cause | Solution |
|---|---|---|
| Rattle persists after pads installed | Insufficient pad thickness or misplaced pads | Replace with thicker anti‑vibration pads or add a second layer. |
| Organizer slides during sharp turns | Non‑slip strips have lost adhesion | Clean surface and re‑apply fresh strips; reinforce with straps. |
| Foam pads detach over time | Adhesive failure due to heat | Use high‑temperature automotive‑grade double‑sided tape. |
Conclusion
By following the six steps outlined above, one can transform a noisy trunk organizer into a quiet, stable cargo solution. The combination of XCEL Anti‑Vibration Pads, non‑slip strips, and adjustable straps addresses both the source and transmission of rattles. Whether using the AOPHY SUV Trunk Organizer or the AOKJOY Collapsible Trunk Organizer, the principles remain the same. Implement these DIY fixes and enjoy a quieter ride without sacrificing storage capacity.
Products Mentioned in This Guide
Frequently Asked Questions
What typically causes rattling noises in a trunk organizer?
Loose panels, unsecured straps, and metal clips vibrate against the trunk walls, creating rattles when the vehicle moves.
Which damping materials work best for soundproofing a trunk organizer?
Closed‑cell foam, rubber matting, and self‑adhesive felt strips are most effective at absorbing vibrations.
How can I locate the exact vibration sources in my organizer?
Press each section while the car is stationary and listen for noise, then repeat the test with the engine running to pinpoint active points.
Can I use household items instead of specialty soundproofing products?
Yes, items like yoga mats, carpet padding, or old towels can be cut to size and serve as inexpensive vibration dampeners.
How often should I inspect the soundproofing to keep the organizer quiet?
Check the damping material every 3–6 months for wear or displacement and replace or re‑secure as needed.