How to Make a 3D Trunk Organizer Template: Step‑by‑Step DIY Printable Design, Cutting & Assembly Guide
Introduction
Every driver eventually discovers that the trunk of a vehicle becomes a chaotic storage area. A well‑designed organizer can transform that space into a tidy, functional zone for groceries, tools, sports equipment, and emergency supplies. This guide teaches readers how to create a custom three‑dimensional trunk organizer template that can be printed, cut, and assembled at home. By following the steps, one will learn to measure interior dimensions, design a printable layout, cut the pieces accurately, and assemble a sturdy organizer that fits perfectly. The guide also recommends several Amazon products that simplify each stage, although the process remains achievable without any purchase.
What You'll Need
- Measuring tape or laser distance measurer
- Computer with vector‑design software (e.g., Adobe Illustrator, Inkscape)
- Standard office printer (A4) or large‑format printer for bigger sheets
- Heavy‑duty utility knife or precision rotary cutter
- Self‑adhesive foam board or 600D Oxford fabric panels
- Strong double‑sided tape or spray adhesive
- Adjustable straps and Velcro strips (optional for securing the final product)
- Optional tools: GDNasist Car Trunk Organizer, MIKKUPPA 65L Trunk Organizer, AOKJOY Collapsible Car Trunk Organizer, FORTEM Foldable Car Trunk Organizer, Femuar Large Backseat Trunk Organizer
Step 1: Measure Your Trunk Space
Accurate measurements are the foundation of a successful 3D template. Use a flexible measuring tape to record the length, width, and height of the trunk interior, noting any protrusions such as spare‑tire wells or wheel arches. Write the dimensions on a notepad in centimeters for easier conversion to design software. For example, a midsize SUV may have an interior of 115 cm (L) × 95 cm (W) × 45 cm (H). Record the location of any fixed points where straps will attach later.
Why this matters: Incorrect dimensions lead to a template that either does not fit or interferes with vehicle safety features. The GDNasist Car Trunk Organizer provides a reference size (approximately 45 L capacity) that helps visualise how much volume your custom organizer should occupy.
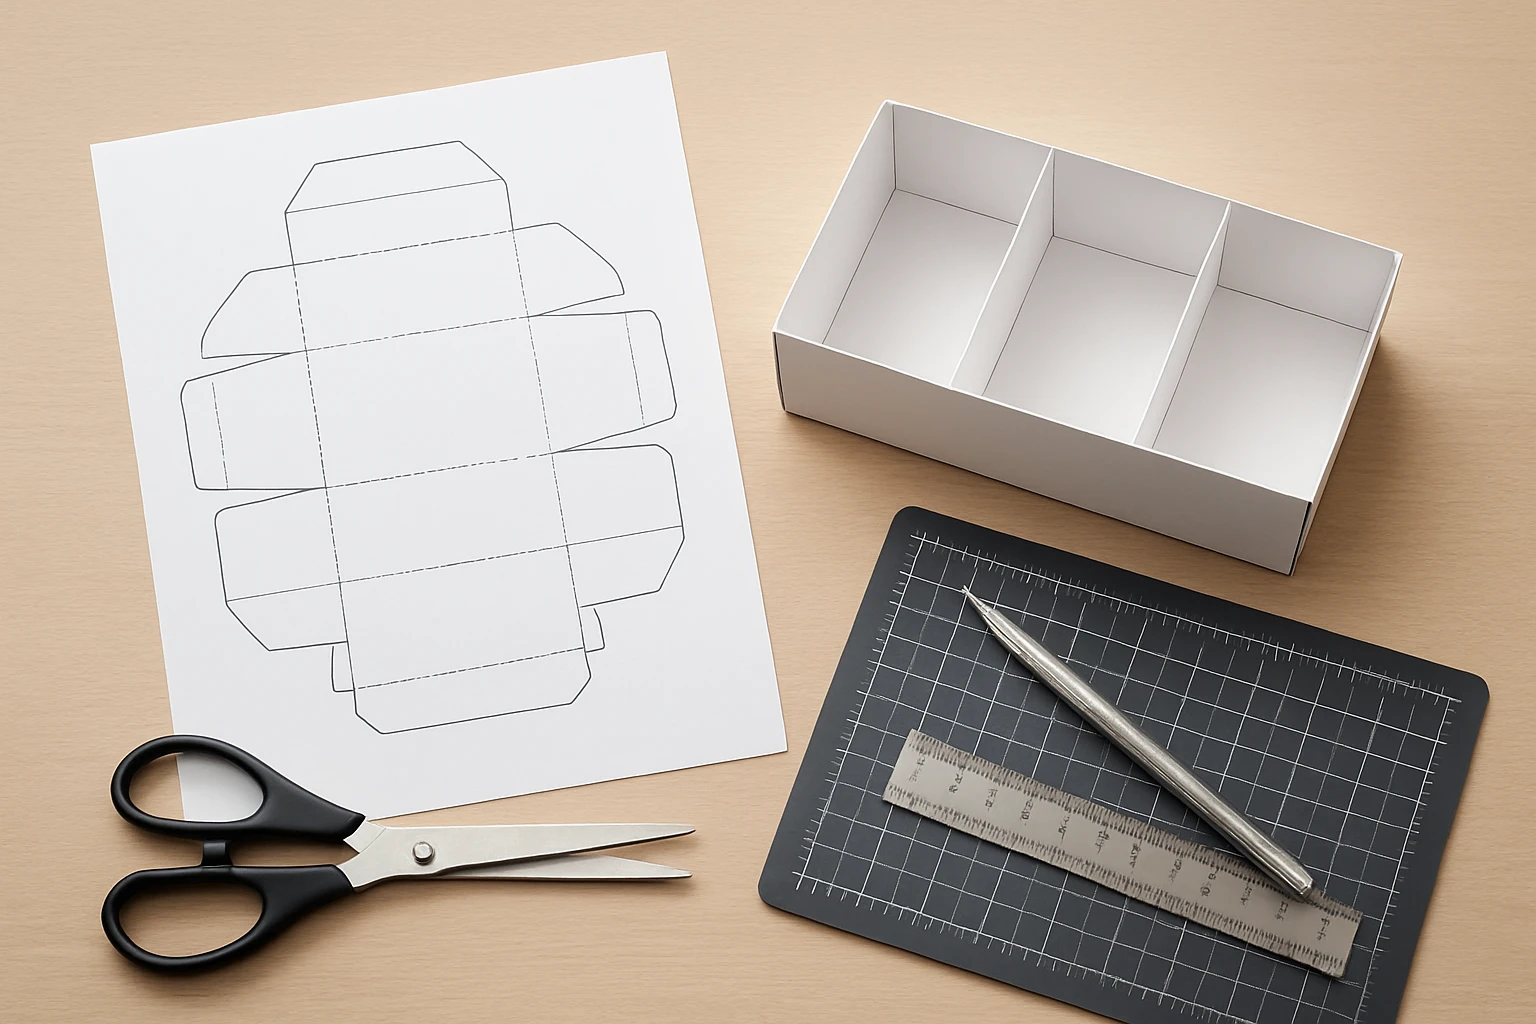
Step 2: Sketch the Layout in Design Software
Open your vector‑design program and create a new document using the exact trunk dimensions recorded in Step 1. Draw a rectangular base that matches the floor area. Then, add vertical walls for each side, keeping a wall thickness of 0.5 cm to ensure structural integrity. Incorporate removable dividers by drawing interior panels that can be repositioned after assembly.
For a 3D effect, use the software’s “extrude” or “offset” functions to give each wall a realistic depth. Label each panel (Base, Front Wall, Side Wall A, Side Wall B, Divider 1, etc.) so that cutting and assembly become straightforward.
Product recommendation: The MIKKUPPA 65L Trunk Organizer demonstrates a three‑size folding system that can be replicated in your design. Its 65 L capacity and adjustable straps illustrate how modular panels can be arranged for different cargo loads.
Step 3: Export and Print the Template
Once the layout is complete, export each panel as a high‑resolution PDF. If your printer can handle A3 or larger sheets, print the panels at full scale. Otherwise, split each panel into tiled A4 sections using a “poster” printing option. After printing, assemble the tiled sheets on a flat surface and tape them together to recreate the full‑size panel.
Why print on sturdy material: Using a heavy‑weight paper or thin cardboard reduces warping during cutting. For a more durable prototype, consider printing on self‑adhesive foam board, which adds rigidity without additional framing.
Step 4: Cut the Panels Precisely
Place the printed panel on a cutting mat. Using a utility knife or rotary cutter, follow the outer edges and interior cut lines. Apply steady pressure and cut slowly to avoid jagged edges. After cutting, use a fine‑grit sandpaper to smooth any rough corners.
Safety tip: Keep the blade away from your hands and replace it frequently for clean cuts.
Recommended product: The AOKJOY Collapsible Car Trunk Organizer features a foldable design that relies on precise cuts. Its 600D Oxford cloth is easy to cut with a sharp blade, and the non‑slip straps illustrate where reinforcement may be needed in your custom version.
Step 5: Assemble the 3D Structure
Begin by attaching the base panel to the front and side walls using double‑sided tape or spray adhesive. Align the edges carefully; any misalignment will become visible when the organizer is placed in the trunk. Once the main walls are secured, insert the interior dividers. Because the dividers are removable, you can use Velcro strips or snap‑fit tabs to allow future reconfiguration.
Reinforce high‑stress points (such as the corners) with additional tape or small wooden dowels if you desire extra rigidity. For a professional finish, wrap the outer edges with a thin strip of fabric matching the interior of your vehicle.
Product insight: The FORTEM Foldable Car Trunk Organizer utilizes rigid base plates and interlocking buckles. Replicating these features in your DIY version—by adding a thin plywood base and snap‑fit connectors—enhances load‑bearing capacity and prevents the organizer from collapsing under heavy groceries.
Step 6: Install the Organizer in Your Vehicle
Position the assembled organizer on the trunk floor. Adjust the built‑in slots or straps to align with the anchor points you noted in Step 1. Secure the organizer with the adjustable straps that come with many commercial models, or use the Velcro strips you attached earlier. Test the stability by gently shaking the trunk; the organizer should remain firmly in place.
If you own a vehicle with a backseat that offers additional storage, consider hanging the Femuar Large Backseat Trunk Organizer behind the seat. Its 8‑pocket layout can complement the floor organizer, providing quick access to smaller items such as maps, first‑aid kits, or electronic accessories.
Tips & Pro Tips
- Use a grid layout. Align all cut lines on a 1 cm grid to simplify measurement conversion.
- Test with cardboard first. Build a prototype from inexpensive cardboard before cutting expensive foam board.
- Waterproofing. Apply a thin layer of clear spray sealant to the interior surfaces if you anticipate spills.
- Modular design. Incorporate removable dividers with snap‑fit tabs, allowing the organizer to adapt to different cargo shapes.
- Weight distribution. Place heavier items low and near the centre of the trunk to maintain vehicle handling.
Troubleshooting
| Problem | Possible Cause | Solution |
|---|---|---|
| Organizer slides during braking | Insufficient strap tension or lack of non‑slip base | Attach additional non‑slip strips or use the built‑in straps from the MIKKUPPA 65L Trunk Organizer as a reference. |
| Cut edges are jagged | Dull blade or uneven pressure | Replace the utility knife blade and cut slowly, using a metal ruler as a guide. |
| Water leaks onto items | Material not waterproof | Line the interior with a thin waterproof liner or switch to the 600D Oxford cloth used in the AOKJOY Collapsible Car Trunk Organizer. |
Conclusion
Creating a custom 3D trunk organizer template empowers one to tailor storage precisely to a vehicle’s dimensions and personal cargo habits. By measuring accurately, designing in vector software, printing at full scale, cutting cleanly, and assembling with sturdy adhesives, one can produce a professional‑grade organizer without expensive pre‑made solutions. The recommended Amazon products serve as practical references and optional tools that streamline each stage, yet the guide remains fully functional without them. Implement the steps, experiment with modular dividers, and enjoy a clutter‑free trunk that enhances both convenience and safety.
Products Mentioned in This Guide
Frequently Asked Questions
What measurements do I need to take before designing a 3D trunk organizer?
Measure the trunk’s length, width, and height at the deepest points, noting any wheel wells or protrusions that affect the shape.
Which software can I use to create the printable template?
Free tools like Inkscape or paid options like Adobe Illustrator work well for drawing vector cut‑lines.
Can I print the organizer pieces on a standard home printer?
Yes, print smaller sections on A4 paper and tape them together, or use a large‑format printer for fewer seams.
What tools are recommended for cutting the printed pieces accurately?
A heavy‑duty utility knife or a precision rotary cutter provides clean cuts along the template lines.
Is self‑adhesive foam board the best material for the organizer?
Foam board offers lightweight rigidity, but 600D Oxford fabric panels give extra durability and water resistance.