How to Install a Trunk Organizer Anchor System: Step-by-Step Guide to Secure Cargo in Cars & SUVs
Introduction
Secure cargo in the trunk of a car or SUV prevents shifting, reduces wear on interior components, and enhances safety for passengers. This guide will teach the reader how to evaluate the trunk space, select appropriate anchor points, and install a reliable organizer system. The reader will learn which tools and hardware provide the best balance of strength, corrosion resistance, and ease of installation. By following the steps, one can create a versatile anchor network that accommodates a wide range of cargo types.
What You'll Need
- Measuring tape and marker
- Drill with appropriate bits (metal and wood)
- Socket set or wrench
- Protective gloves and eye protection
- Anchor hardware (recommended products are listed in the steps)
- Mounting bolts or screws compatible with the anchor points
Step 1: Assess the Trunk Layout and Cargo Requirements
Begin by emptying the trunk and measuring the length, width, and depth of the usable floor area. Identify the heaviest items that will be transported regularly, such as sports equipment, toolboxes, or pet carriers. Record the locations of existing factory tie‑down points, if any, because they can serve as reference locations for additional anchors. Understanding the load distribution will guide the selection of light‑duty versus heavy‑duty anchors.
Step 2: Mark Optimal Anchor Locations
Using the measurements, mark potential anchor locations on the trunk floor and side walls where the organizer will attach. Space the marks evenly to allow a balanced load and to avoid interference with wheel wells or seat belts. Verify that each marked spot aligns with a solid structural member, such as a cross‑member or reinforced panel. This preparation reduces the risk of anchor failure during travel.
Step 3: Prepare the Mounting Surfaces
Clean each marked area with a mild solvent to remove dust, grease, and corrosion. If the surface is painted metal, lightly sand the area to create a rough texture that improves bolt grip. For wooden or composite panels, ensure that the surface is flat and free of splinters. Proper preparation enhances the long‑term holding power of the anchor hardware.
Step 4: Install Light‑Duty Anchors for General Organization
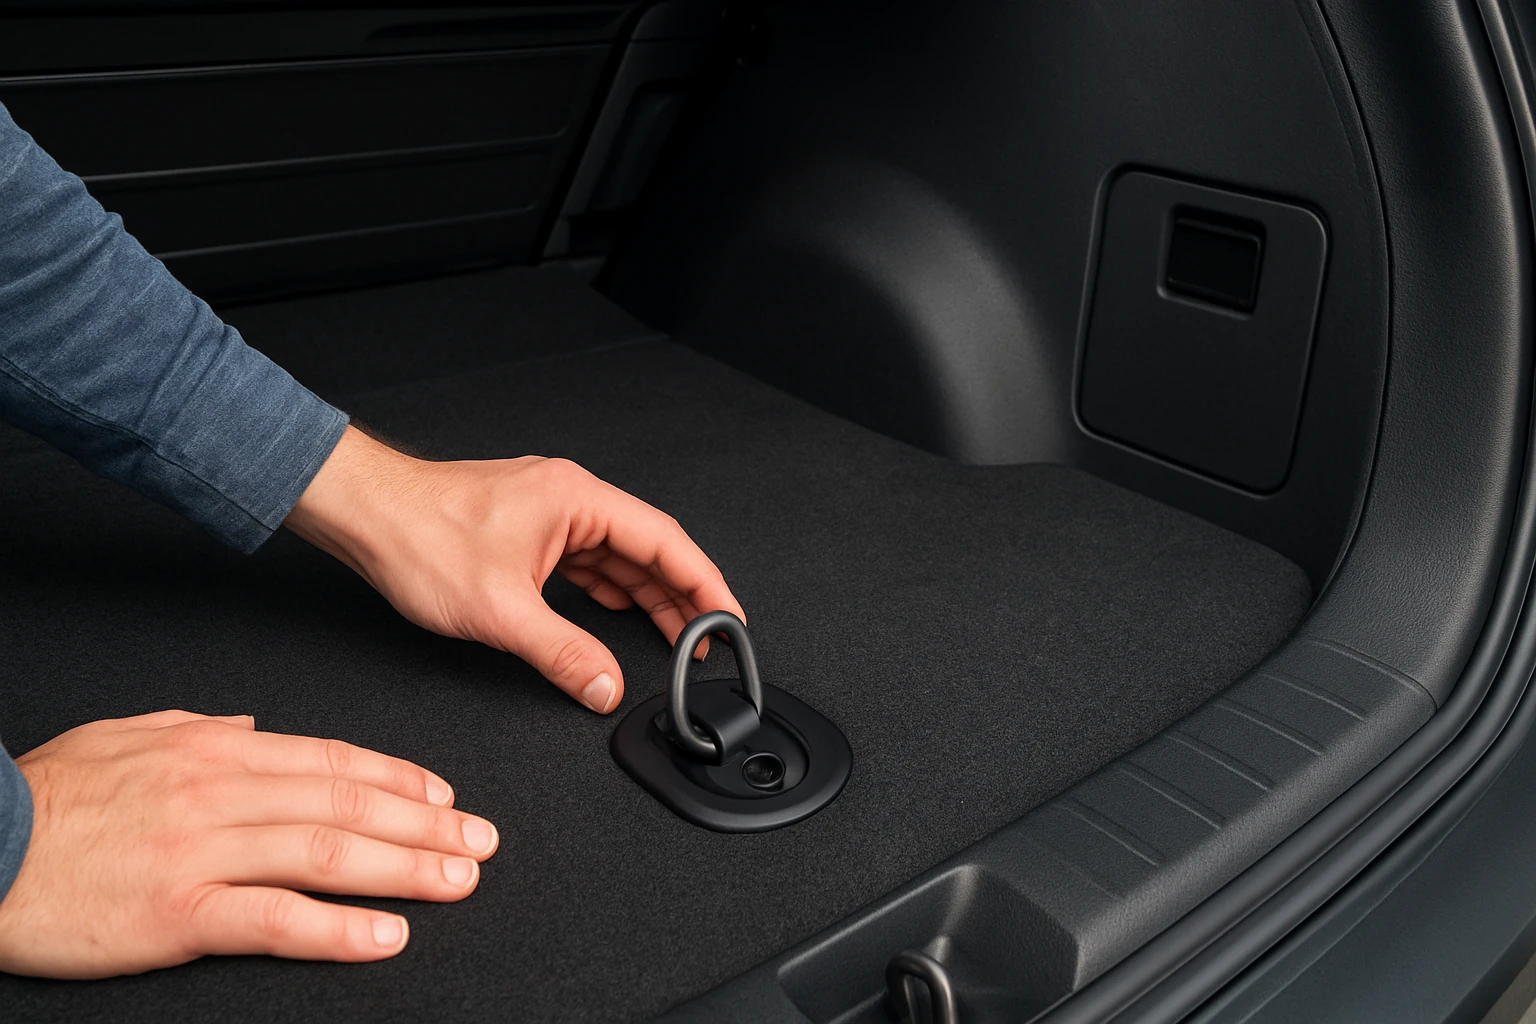
For securing lightweight items such as grocery bags, small tool kits, or camping supplies, install the JCHL Tie Down Anchors. These stainless‑steel rings are corrosion‑resistant, feature a small round circle for bolts up to 8.5 mm, and a larger oval ring for broader strap hooks. Each anchor costs $5.76 and carries a rating of 4.5 out of 5 stars from 499 reviews, indicating strong customer satisfaction. Drill a 1/4‑inch hole at each marked spot, insert the anchor, and secure it with a bolt of appropriate length. The lightweight design allows rapid installation while providing a reliable attachment point for standard ratchet straps.
Step 5: Install Heavy‑Duty Recessed Anchors for High‑Load Cargo
When transporting heavy equipment such as a roof rack, large suitcases, or a side‑by‑side ATV, the Digank Recessed Tie Down Anchors are recommended. Each D‑ring offers a 6,000 lb break strength, thanks to high‑strength steel with a zinc coating that prevents rust. The product is priced at $35.99 and holds a 4.7 out of 5 star rating from 131 reviewers, reflecting its durability. Use a hole‑saw to cut a 2‑inch recess in the trunk floor, place the 6.45‑inch backing plate, and fasten the anchor with the supplied hardware. The recessed design keeps the surface smooth when the anchor is not in use, preventing tripping hazards and preserving interior aesthetics.
Step 6: Add Versatile Universal Anchor Points for Flexible Placement
For areas where the exact location may change depending on cargo shape, install the Keeper Universal Anchor Points. These chrome‑plated toggle bolts feature a secure locking mechanism that expands behind the panel, creating a strong anchor without the need for a through‑bolt. Priced at $17.95 with a 4.5 out of 5 star rating from 622 reviews, they provide a balance of strength and adjustability. Drill a 3/8‑inch hole, insert the toggle, and pull the bolt to engage the locking arms. The anchor can be repositioned by releasing the toggle, allowing the organizer to adapt to different load configurations.
Step 7: Attach the Trunk Organizer and Test the System
Secure the organizer to the installed anchors using compatible straps, hooks, or cam‑buckles. Ensure that each strap is tightened evenly to avoid uneven pressure on the anchor points. Load the trunk with a representative weight and drive a short distance to observe any movement. If any anchor shows signs of flexing or the organizer shifts, re‑tighten the bolts or consider upgrading to a higher‑capacity anchor such as the SKTYANTS Cargo Tie Down Anchors for added security.
Tips & Pro Tips
- Apply a thread‑locking compound to bolts on stainless‑steel anchors to prevent loosening due to vibration.
- When installing recessed anchors, seal the surrounding area with a silicone sealant to protect against moisture ingress.
- Use color‑coded straps (e.g., red for heavy loads, blue for light loads) to quickly identify the appropriate anchor type.
- Periodically inspect all anchors for signs of corrosion, wear, or bolt stretch, especially after off‑road trips.
Troubleshooting
Problem: Anchor bolts loosen after a few trips.
Solution: Apply a medium‑strength thread locker and re‑torque the bolts to the manufacturer’s specification. Verify that the mounting surface is flat and free of debris before re‑installing.
Problem: Recessed D‑ring does not sit flush with the floor.
Solution: Ensure the backing plate is fully seated and that the hole diameter matches the recommended size. If the floor material is too soft, consider adding a metal reinforcement plate beneath the anchor.
Conclusion
By following this systematic approach, one can create a robust trunk organizer anchor system that secures cargo, protects interior components, and enhances overall vehicle safety. The guide covered assessment, marking, surface preparation, installation of light‑duty, heavy‑duty, and universal anchors, and final testing. Readers are encouraged to apply these methods to their own vehicles and to select the recommended hardware for optimal performance.
Products Mentioned in This Guide
Frequently Asked Questions
What tools are required to install a trunk organizer anchor system?
You need a measuring tape, marker, drill with metal/wood bits, socket set or wrench, and protective gloves and eye protection.
How do I determine the best anchor points in my trunk?
Measure the trunk floor, locate sturdy structural members, and mark positions that align with the heaviest cargo for optimal support.
Can I use standard bolts instead of specialized anchor hardware?
Yes, as long as the bolts or screws match the size and material of the anchor points and provide adequate strength and corrosion resistance.
Is it necessary to remove the trunk liner before drilling?
Removing the liner protects it from damage and gives clear access to the metal frame for accurate drilling.
How can I prevent rust after installing the anchor system?
Apply a rust‑inhibiting primer or sealant to drilled holes and use stainless‑steel or coated hardware.