How to Make Custom Foam Inserts for Trunk Organizers: A Step-by-Step DIY Guide
Introduction
One of the most common complaints among vehicle owners is the lack of secure storage for delicate items such as electronics, tools, or groceries. A well‑designed foam insert can transform a generic trunk organizer into a protective cradle that prevents shifting, rattling, and damage. In this guide, the reader will learn how to measure, design, cut, and install custom foam inserts that fit precisely inside the TRUNKCRATEPRO Collapsible Trunk Organizer. The process combines basic carpentry techniques with inexpensive materials, making it accessible to anyone with a moderate level of DIY experience.
What You’ll Need
- High‑density foam sheet (1‑inch thickness works well for most cargo)
- Utility knife or electric carving knife
- Self‑adhesive vinyl cutter mat or a clean, flat work surface
- Measuring tape or ruler
- Permanent marker
- Spray adhesive (optional, for extra hold)
- TRUNKCRATEPRO Collapsible Trunk Organizer – serves as the test platform for the insert
Step 1: Assess the Organizer’s Interior Dimensions
The first step is to obtain accurate interior measurements of the organizer’s compartments. Unfold the TRUNKCRATEPRO Collapsible Trunk Organizer and lay it on a flat surface. Using a measuring tape, record the length, width, and depth of each compartment you intend to protect. For example, the large central compartment measures approximately 23.6" × 14.6" × 12.5". Write these numbers on a sheet of paper; they will become the template for your foam cutouts. Precise measurements are essential because an ill‑fitting insert will either shift or compress the foam, reducing its protective qualities.
Step 2: Choose the Right Foam Density
High‑density polyurethane foam provides a balance between rigidity and cushioning. A density of 1.8–2.0 lb/ft³ is ideal for most automotive applications. Thicker foam (1.5–2 inches) offers greater shock absorption but adds weight. Consider the weight capacity of the organizer – the TRUNKCRATEPRO is built with reinforced stitching and a non‑slip bottom, allowing it to support up to 30 lb per compartment without deformation.
Step 3: Transfer Measurements onto the Foam Sheet
Lay the foam sheet on the cutter mat. Using a permanent marker, trace the dimensions of each compartment onto the foam. If you plan to create separate inserts for individual items (e.g., a laptop, a water bottle, a tool kit), draw smaller rectangles within the larger outline. Label each shape for easy identification later. This visual planning step reduces waste and ensures that each cutout serves a specific purpose.
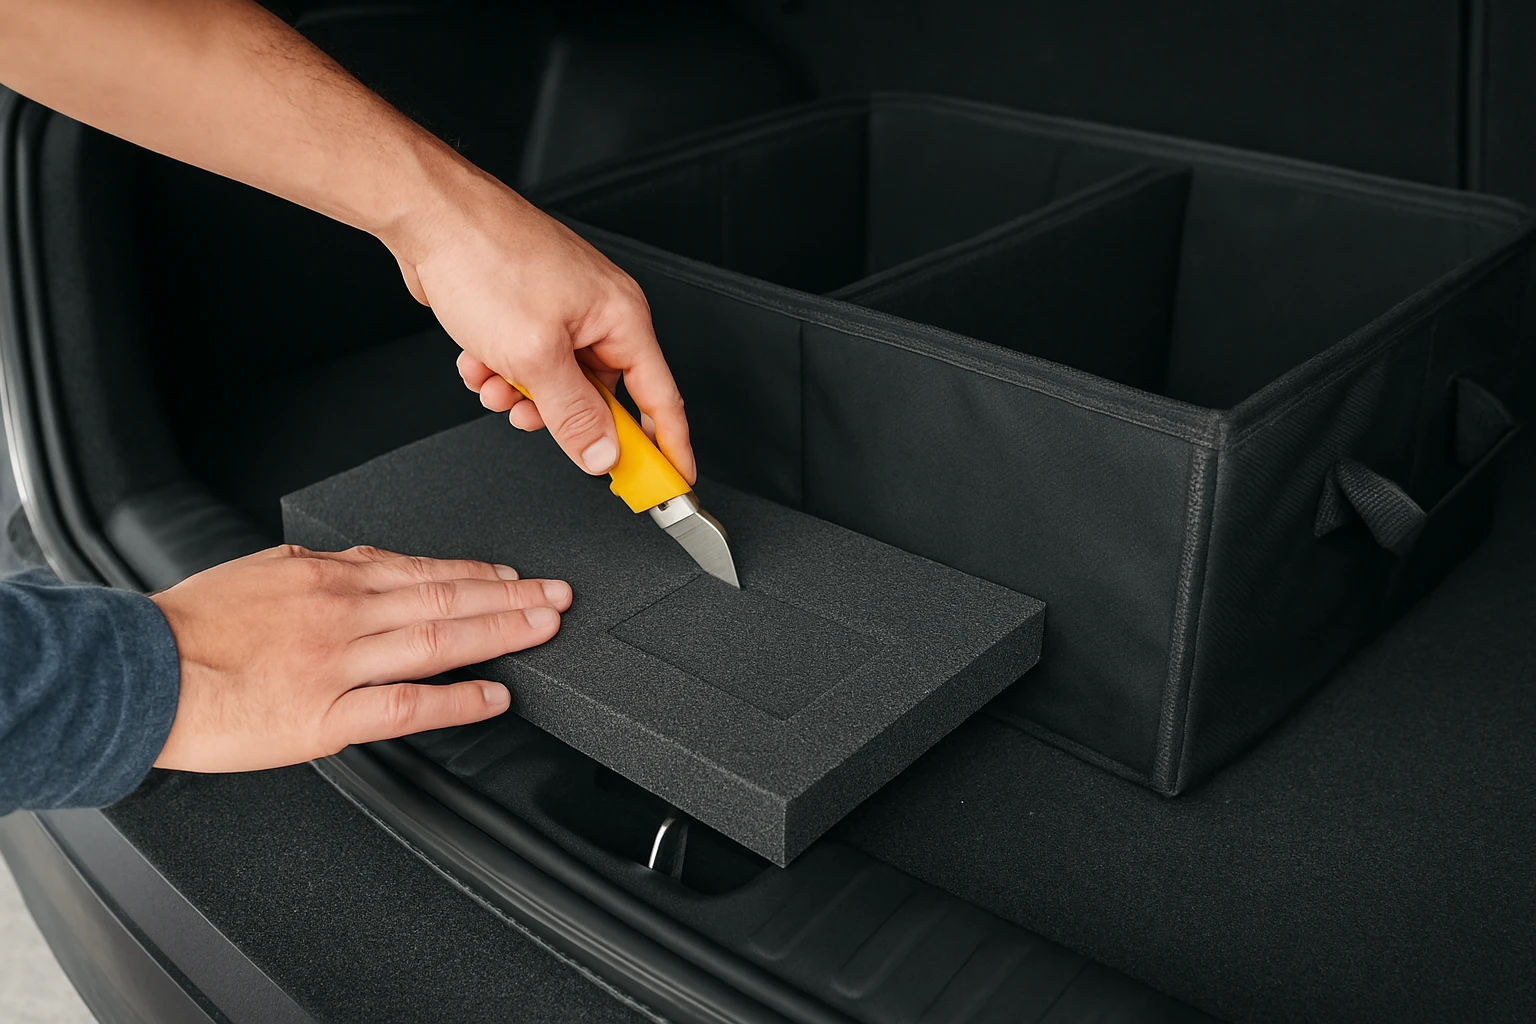
Step 4: Cut the Foam Precisely
With a sharp utility knife, score the marked lines on the foam. Apply steady pressure and use a ruler as a guide to achieve straight edges. For intricate cuts, an electric carving knife provides smoother results. After scoring, bend the foam along the line and snap it cleanly. Remove any excess pieces and sand rough edges with fine‑grit sandpaper if necessary. The goal is a snug, flat surface that will sit flush against the organizer’s interior walls.
Step 5: Test Fit the Inserts
Place each foam piece inside the corresponding compartment of the TRUNKCRATEPRO Collapsible Trunk Organizer. Verify that the insert does not shift when the organizer is lifted or when weight is applied. If any piece is too large, trim it lightly; if it is too small, add a thin layer of foam to fill gaps. This iterative fitting process ensures a secure, custom‑fit solution.
Step 6: Secure the Inserts (Optional)
For added stability, apply a light coat of spray adhesive to the back of each foam piece before placing it in the organizer. The adhesive creates a temporary bond that prevents the insert from sliding during sudden stops or sharp turns. Allow the adhesive to cure for a few minutes, then re‑test the fit. The TRUNKCRATEPRO already features securing straps and a non‑slip bottom, so the adhesive is optional but recommended for high‑value cargo.
Step 7: Final Assembly and Usage
Once all inserts are fitted and secured, load your items into the organizer. The foam will cradle each object, reducing movement and protecting against impacts. Close the organizer’s lid and secure the straps. The result is a professional‑grade storage system that can handle groceries, sports equipment, and even fragile electronics without the usual mess.
Tips & Pro Tips
- Label each compartment with a small vinyl tag to remember the intended contents.
- Use double‑sided foam tape if you need a removable yet firm attachment.
- For waterproof protection, consider a thin layer of marine‑grade vinyl over the foam before insertion.
- When cutting foam, keep the blade at a 45° angle to achieve cleaner edges.
- Test the organizer with a full load before a long trip to ensure the inserts remain in place.
Troubleshooting
Problem: Foam shifts during driving.
Solution: Apply a thin line of spray adhesive or use the organizer’s built‑in securing straps more tightly. Verify that the foam thickness matches the compartment depth.
Problem: Inserts feel too soft and do not protect fragile items.
Solution: Upgrade to a higher‑density foam (2.2 lb/ft³) or add a layer of corrugated cardboard beneath the foam for additional rigidity.
Conclusion
Creating custom foam inserts for a trunk organizer is a straightforward yet highly effective way to enhance cargo protection and organization. By following the steps outlined above, the reader can transform the TRUNKCRATEPRO Collapsible Trunk Organizer into a bespoke storage solution that accommodates specific items, reduces noise, and prevents damage. The skills learned—accurate measuring, precise cutting, and thoughtful placement—are transferable to other DIY projects, encouraging continued innovation in vehicle organization.
Products Mentioned in This Guide
Frequently Asked Questions
What thickness of foam is best for a trunk organizer insert?
A 1‑inch high‑density foam sheet balances protection and flexibility for most cargo.
How do I measure my trunk organizer for a custom foam cut?
Measure the interior length, width, and depth of each compartment, then add a 1‑2 mm margin for a snug fit.
Can I use a utility knife instead of an electric carving knife?
Yes, a sharp utility knife works fine; just cut slowly and use a straight edge for clean lines.
Do I need spray adhesive to keep the foam in place?
Adhesive is optional; the foam usually stays put from friction, but spray adhesive adds extra security for heavy loads.
Is the DIY foam insert compatible with the TRUNKCRATEPRO Collapsible Trunk Organizer?
Yes, the guide is designed for the TRUNKCRATEPRO model, and the measurements can be adjusted for similar organizers.